How to Style a Minimalist Home

Minimalist home decorating involves seeking the perfect interplay between open space, light, colour and furnishing. And while the concept pretty much speaks for itself, don’t think for a second it’s easy to pull off.

Choosing the Right Railing Fabricators

Choosing the Right Railing Fabricators

Choosing the right railing fabricators is vital to the safety and quality of your work. This is particularly true if you work with materials such as stainless steel, which can be subject to harsh weather and rough handling.

An experienced and knowledgeable railing manufacturer can make all the difference between a good job and a great one. Here are some tips to help you choose the right railing fabricator for your next project.

Experience

Choosing the right railing fabricators for your project can make all the difference between an effective and smooth installation and a snag-filled one. In addition, the ideal partner can provide complete product documentation, submittal drawings, and design options that meet all your project specifications.

A reputable supplier can also engineer and manufacture their railing systems, ensuring they fit all of your project’s specifications. This eliminates the risk of corner-cutting and ensures that you’re delivering top-quality solutions that your clients will be happy with for years to come.

In-house fabrication is a brilliant choice for building professionals who prefer to maintain control over every step of their project. It saves time and money at construction sites while reducing the chance of production errors that could throw off project schedules.

Certifications

Choosing the right railing fabricators to provide products and services for a project can make all the difference in delivering a smooth and seamless experience. From a technical standpoint, the best ones should be able to provide high-quality products with clear installation instructions and relevant product information to ensure that your building’s railing system delivers the performance that it promises.

The right supplier will also be able to provide submittal drawings and other documentation that can make a big difference in the quality of construction on a job site. This is especially important when dealing with complex and often expensive components such as glass infills and structural barriers.

Another consideration is the certifications that the supplier might have. Choosing a railing fabricator with an International Railway Industry Standard (IRIS) certification is one of the best choices for successful and seamless project completion. It’s a company-level certification designed to help manufacturers and suppliers deliver their customers the most relevant and impactful solutions.

Portfolio

The best railing fabricators have a diverse portfolio of work. This is important because it allows them to demonstrate their versatility and ability to meet various client needs. For example, suppose a potential client is looking for a modern design that blends in with a specific architectural style. In that case, the right fabricator can create a customized railing that fits that aesthetic perfectly.

A top-quality railing partner will also offer a wide range of options for customization, including material selection and finish types. With this diversity at their disposal, it will be easy to find a solution that works visually and practically for the project. This will help reduce the risk of cutting corners or compromising the original railing design to get an attractive result. This will save time and money in the long run and will be a much better experience for everyone involved. It will also keep the project moving forward on schedule and within budget.

References

Whether you’re looking for a new railing system for your commercial project or need to replace your residential patio and deck railings, choosing the right fabricators is crucial to ensuring that you get the look and feel you want while reducing costs. In addition, selecting a company that offers a comprehensive product catalog and technical support is essential. This can include everything from text-based installation instructions to product videos and diagrams that will make installing your railing system much more accessible.

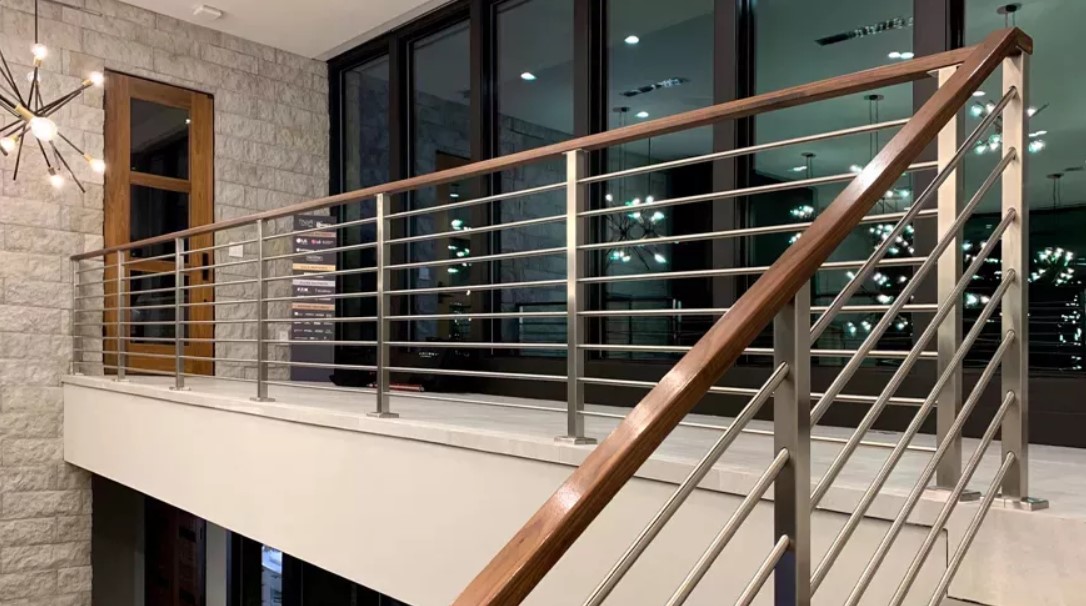
The best railing systems are fabricated using the latest and greatest fabrication methods to ensure a sturdy, long-lasting, low-maintenance, and beautiful finished product. For instance, a stainless steel railing is the best choice for outdoor applications and is also the best way to keep your building safe while protecting the environment from sun damage and rainwater. The most impressive thing about this material is that it is not susceptible to corrosion or discoloration, despite the harsh weather conditions that are often encountered by building owners and contractors alike.

How to Do Countertop Installation in Simple Steps

How to Do Countertop Installation in Simple Steps

There is nothing quite like the polish and shine of brand-new countertops – and for most property owners, it is a bathroom or kitchen upgrade worth their time, money, and energy. Fresh surfaces with a complimentary backsplash can give new life to areas around people’s homes. 

If they are looking for budget-friendly options and wondering if a new countertop and backsplash can be installed Do-It-Yourself, the answer is a resounding yes. However, the job requires specialized tools and is pretty time-consuming. In this article, we will take a closer look at how to install new countertops.

Installing new countertops: Preparation

Besides the materials, people will need to check off a couple of pre-project checklist before installing a new countertop. Here are some additional planning items people need to consider:

  • The project budget
  • The materials people wish to install
  • The textures, patterns, and colors to find the perfect match
  • How the new countertop fits into the overall renovation

Popular types for Do-It-Yourself installation

Popular materials like granite and other natural stone countertops and backsplashes, which installation firms can easily do. But laminates and composite materials are pretty popular and a lot easier, as well as lighter to Do-It-Yourself install. 

Laminate countertops can cost around $800 to $1,700 to install, making them an affordable option for property owners. Laminate or solid-surface countertops like Formica are also a lot easier to maintain and repair. They come in different designs, patterns, and colors, making them a Do-It-Yourself-friendly alternative, in line with other materials like reclaimed wood. 

Check out this site for info about Formica.

Design and cut a countertop template

Installing new countertops and backsplashes is definitely a measure-twice-cut-once-kind of project. The most important, as well as a time-consuming first step in the Do-It-Yourself installation is to take the measurement, mark the materials, cut the dimension of the laminate counter, and decide where the furniture and appliances will go.

Property owners also need to make sure to take into consideration the counter overhang, which is between three and one inch. After cutting the material, people should secure their laminate slab with clamps to stable surfaces. 

They can use a pencil or masking tape to measure their cut lines, file, or sandpaper to smooth it out. Some premade templates are readily available in most home-improvement stores on the Internet. If the property owner’s space is a straightforward layout or a simple slab, cutting the countertop may not be needed, and they can order standard prefab materials.

Prepare the area

Before installing a new countertop or removing the old ones, some preparatory work is needed. Property owners will need to:

  • Disconnect the water source to the bathroom or kitchen where they are working
  • Remove appliances like drain trap, range, and sink
  • Scrape away the backsplash caulking that holds it in place
  • Remove the old backsplash, as well as all extra tiles

If individuals are reinstalling the same furniture or appliance later, put them in a safe and dry place. Also, homeowners need to ensure their screws and other installation materials are organized nearby.

How to Do Countertop Installation in Simple Steps

Remove old countertops

With all the caulking and the wall that connected the backsplash gone, the owners need to remove the corner screws and bolts that hold the old countertop in place. With screws and bolts out, owners need to be able to slide the old slab off in one piece. 

If the old slab were attached with silicone, they might need to use a damp and warm rag over the silicone to loosen it up. After that, they can use abrasive scrubbing pads to remove what is left. Homeowners can enlist the help of family members or friends to lift the old slab and move it somewhere safe and out of the way.

To learn more about this topic, click arizonainterior.com/ for details.

Dry fit the brand-new counter

To test the measuring work, homeowners can place the new slab they have already cut in the area. They can check to see if the counter fits. Most importantly, the counter should fit perfectly against the wall. People should use a specialized tool like a belt sander for minor dimensions and cutting errors.

Secure the new counter to the cabinets

Once homeowners get the right fit, it is time to secure the new counter. Most manufacturers will recommend their process for attaching their products. For laminate slabs, there are two possibilities:

Property owners will have to apply manufacturer adhesive or caulk along the top edges of the cabinets where the new slab meets. In this instance, they may need to use small pieces of wood or shims every twelve to eighteen inches to hold the slab up slightly while the adhesive dries. 

The laminate counter peels and sticks, and people only need to remove the barrier during installation. Let the caulk or manufacturer adhesive dry for a couple of hours, and check the work. If there are any holes or gaps, add more adhesive or caulk to that area. Finally, fasten the countertop to the cabinets with bolts or screws.

Reinstall backsplash and seal wall joints

At this point of the project, the only part that is still exposed should be the space between the counter and the wall. The easiest way to seal the exposed parts is to draw an even line on the top using a caulk gun. If property owners should spruce up the wall involved, they can install tiles for the backsplash – the possibilities are endless. Before people can reinstall their appliances, they need to let the wall joint and backsplash dry for three to five hours.

Reinstall the appliances

Finally, homeowners can hook up the appliances they took out before the project started. Once the sink is installed, they can turn the water resource back on. They need to make sure they double-check everything.

Frequently Asked Questions

How do property owners measure their counter’s surface?

The best and easiest way to calculate the width and length of the counter is by using steel tape to determine the width and length of each section. When it comes to areas with furniture or appliances, they can remove the dimension of every device or item as they work. Once they have done all sections, owners can add the numbers together to get the exact figure.

How do they do outside corners on their counters?

Butt and Milter joints are two common methods if they are using laminate countertops. Property owners should do some research on mirror-cutting techniques to help them get started with the project. If this part seems out of their skillset, it might be worth asking for the help of a professional contractor so they get a perfect fit with no gap.

Benefits of a JanPRO Commercial Cleaning Company Western NY Franchise

Benefits of a JanPRO Commercial Cleaning Company Western NY Franchise

Investing in a JAN-PRO commercial cleaning company Western NY franchise is a great way to become an entrepreneur. As a JAN-PRO franchisee, you will have access to many resources that will help you become successful, including the company’s proprietary cleaning techniques, flexible start-up costs, and a guarantee of customer satisfaction. You will also be involved in setting your franchise prices, policies, and procedures.

Flexible start-up costs

Whether you are a seasoned business professional or a novice, a JAN PRO commercial cleaning company Western NY franchise might be the right choice. With over 2,000 locations in the US and over 2,000 more worldwide, JAN-PRO has a recognizable brand name and has been providing high-quality cleaning services for over a decade.

One of the best parts about a JAN PRO commercial cleaning company Western New York franchise is its stellar brand name and excellent customer service. With a well-trained crew, JAN-PRO will keep your workplace clean and safe. This means you can get more done with less stress, making it a smart choice for those seeking a long-term business opportunity.

The average JAN PRO unit franchise is a reasonably profitable venture. Its royalties are lower than those of other franchises but are still in the range of 10 percent of the gross bill. In addition, the company has a strong brand name and offers training and support for those new to the industry.

Guaranteed customer satisfaction

Providing quality cleaning service is no problem when you have a JAN-PRO franchise. You will have the support of technicians who provide quality control. And you have a team of business leaders worldwide who are knowledgeable about the cleaning industry.

JAN-PRO is a commercial cleaning company that operates on a three-tier franchise model. Each tier is a separate corporate entity with its own staff and internal business structures. The company has a national brand name and is well-known in the cleaning industry.

A JAN-PRO franchise allows a business owner to choose how much to invest, whether to start a part-time or full-time business, and how many accounts to have. This business model is ideal for those who want to control the size of their business and work a flexible schedule. It also provides a stable income, allowing you to build a better life for yourself and your family.

Involvement in setting prices by regional master franchisees

During the past decade, plaintiffs in the JAN-PRO Franchisees case have fought a bitter battle in various courts. JAN-PRO, however, remains adamant that they are the real kings of the castle. Moreover, they have not named their master franchisees as defendants.

In the case of the JAN-PRO franchisees, the court granted summary judgment in favor of JAN-PRO even though the parties are at each other’s throats over who controls the levers of a real-life three-tier franchise system.

The JAN-PRO Franchisees’ case was initially filed in Georgia, but the litigation was transferred to Massachusetts. The point is now stalled. In addition to a summary judgment in favor of JAN-PRO, the plaintiffs in the case also argued that the district court should have applied a different standard.

The JAN-PRO Franchisees’ case is a putative class action. Unlike the prior case, in which McDonald’s employees submitted declarations that they were chain employees, the plaintiffs are not alleged to have worked for JAN-PRO.

Involvement in setting policies and procedures

Whether a party is involved in setting policies and procedures of a JAN-PRO commercial cleaning company Western NY franchise consists of several factors. For example, the parties involvement in developing policies and practices depends on the nature of their relationship. Specifically, the parties are involved in setting policies and procedures if the parties have entered into a franchise agreement that grants JAN-PRO authority to enforce agreements between regional master franchisees and unit franchisees.

Unlike companies that manufacture and sell goods, which have to pay high distribution costs to distribute to end users, companies that sell cleaning services do not incur such charges. As a result, a company such as JAN-PRO holds itself out as a cleaning business and actively profits from its janitorial services. In addition, JAN-PRO sets policies and procedures that apply to the companies of unit franchisees, such as the requirement that master owners sell a minimum number of unit franchises. These policies and procedures may include a non-compete clause that prohibits the master owner from engaging in janitorial services for some time.

How To Buy A Dual Zone Wine Fridge In The UK

How To Buy A Dual Zone Wine Fridge In The UK

Upon discovering your passion for being a serious wine collector of various types of wine, you might feel overwhelmed by all the options of wine fridge technology available on the UK market. It is suggested to glance through several websites and order a wine cooler online. Many manufacturers and outlets pride themselves on only providing the public with the best dual zone wine fridge uk technology intended for those selected few who desire the preservation of red and white wine. So whether you prefer some shop hopping or internet surfing, your need to own a dual zone wine fridge should take precedence. 

To dual zone or not to dual zone, that is the question.

Stand in front of your already established wine bottle collections and determine whether they need to have only the best when it comes to their environmental needs to age in the proper way. Later, you would conclude that nothing else besides a dual-zone wine fridge would be good enough for your priceless wine bottles. Hence, your decision to invest in such a unique piece of wine cooling machinery would not be in vain. The dual zone wine fridge is a piece of technological advancement aimed at providing two different temperature zones within one wine cooling unit. A unique concept, isn’t it? For all wine collectors whose desire lies with the versatility of storing both red and white wine, this type of wine fridge or wine cooler would be a great determining factor. 

Facts about storage temperature for both red and white wine

Many wine experts advise that you can correctly store red and white wine at a temperature between 7 – 18 degrees Celsius. But this can be disputed as a mass of wine collectors believe that red wine needs a warmer storage climate, estimated to be at its pivotal level of 12 degrees Celsius. In comparison, white wine lovers prefer their white wine to be placed in a domain slightly colder as it is also served at a febricity below room temperature. In addition, this debating point surrounding the correct serving temperature is hot on the heels of the proper ageing process. In summary, if a wine is served at a temperature that is too warm, it will lose all its flavours leaving it with only the potent allure of pure alcohol. Therefore, it is widely believed that white wine must be served straight from the wine fridge, where it is stored at a cooler temperature. However, this belief is not always correct as this type of wine’s taste can also be muted. But, in conclusion, the right “comfort zone” depends on the individual‘s preferred taste of white or red wine. 

Simultaneous occurrences within a wine fridge

In hindsight, the correct preservation temperature must be number one on all wine collectors’ lists to tick off. But, other much-needed factors also need to occur to enhance wine cooling and storage technology. For example, a wine fridge must be set at the perfect humidity. Henceforth, the correct measurement must be upheld at a steady 70%. If this feature is lacking, it will lead to unwanted and nasty damage to the fridge and the bottles hoarded inside. If set too high, it might lead to the drying out of the corks, which leads to moisture seeping into the liquid within a wine bottle. On the other hand, if the humidity is initiated to a lower condition, mildew and mould formation would follow immediately after. Finally, keep your precious wine bottle collection out of direct sunlight. Luckily, a wine fridge is constructed so wondrously these days that a UV protective glass door installed to the front would prevent all damaging sun rays from entering the unit.

Beautifying Your Yard For Healthy Streams

That limits the scope of landscape design you might use it for, but it helps you create a 3D rendering that helps you customise any facet of your garden.

garden design software

Skilled designers mix plants and hardscape (stone, fencing and decorations), to create a lovely backyard. The four sectors symbolize the Zoroastrian elements of sky, earth, water and plants. Planting Ideas Selecting crops with fascinating foliage, flowers & fragrance that attraction to people & pollinators. If you’re gravitating towards a theme backyard (colonial, Japanese, southwestern, English cottage), you will find dozens of books that illustrate the design options and methods that distinguish these styles.

Gardening design is whatever you want to make of it. Don’t be afraid to push the envelope while re-doing or creating your small backyard. For each professional panorama designers and owners who’ve a landscape design itch, fully free solutions — not simply software program that gives free trials or demos — are scarce.

One motive could also be that backyard design is perceived as the work of consultants: panorama architects, landscape designers, backyard designers, and panorama contractors. It’s possible you’ll choose an edible backyard design, flower garden design and a lot more. Planting any kinds of vegetation in your backyard could make it look overcrowded.

Plant for lengthy-lasting colour. NO matter how massive or small it is, there’s some sort of gardening design you may implement to take advantage of out of what it’s important to work with. Yard Patios Find design ideas and suggestions for including a patio to your yard panorama.

Backyard Landscapes See how gardeners across the country have landscaped their backyards each large and small. It can save you some cash by growing vegetation in tin cans. Yet a number of the most lovely gardens on the earth were not designed by consultants. Choose perennials that bloom in all four of those segments to maintain the planting in shade for a for much longer time.

raised garden bed design slope

Backyard Planner’s designing software is flexible and supports a 3D digital tour walkaround. Others fill their gardens with so many ornamental components that it can be troublesome to search out the plants. Lands Design is a landscaping design plugin for 3D modelling instrument Rhino With Lands Design, panorama designers can create life like 3D images, virtual tours to raised signify the final landscape to their clients, and draw on giant libraries of crops, timber, and concrete furnishings.

conclusion

Once you have a plan to work from, you can begin to indicate the positive and destructive features of your yard (bushes, shrubs, fences, outbuildings, pathways, views) and natural environmental elements comparable to gentle situations and soil or drainage issues.